
The Cystore offers merchandise from all their titles, including Granblue Fantasy. They accept international forms of payment, but can only mail packages within Japan.
This means that it’s possible for foreigners to purchase goods with some extra help – we’ll discuss what options you have for delivery, and show you how to create an acccount and add payment information.
Easy (But Pricier) Option: Proxy Service
If you don’t want to deal with the hassle of inputting information into a Japanese site, there are plenty of services that will buy items on your behalf and send them to you, otherwise known as Proxy Services. They range in how much assistance they give you – some, like From Japan will just ask for a link to the product you want and do the work for you, so you don’t even have to create an account on the Cystore. Others, like Tenso simply give you a Japanese address, so you’ll have to create a Cystore account yourself and enter this address into the mailing info.
Creating a Cystore Account
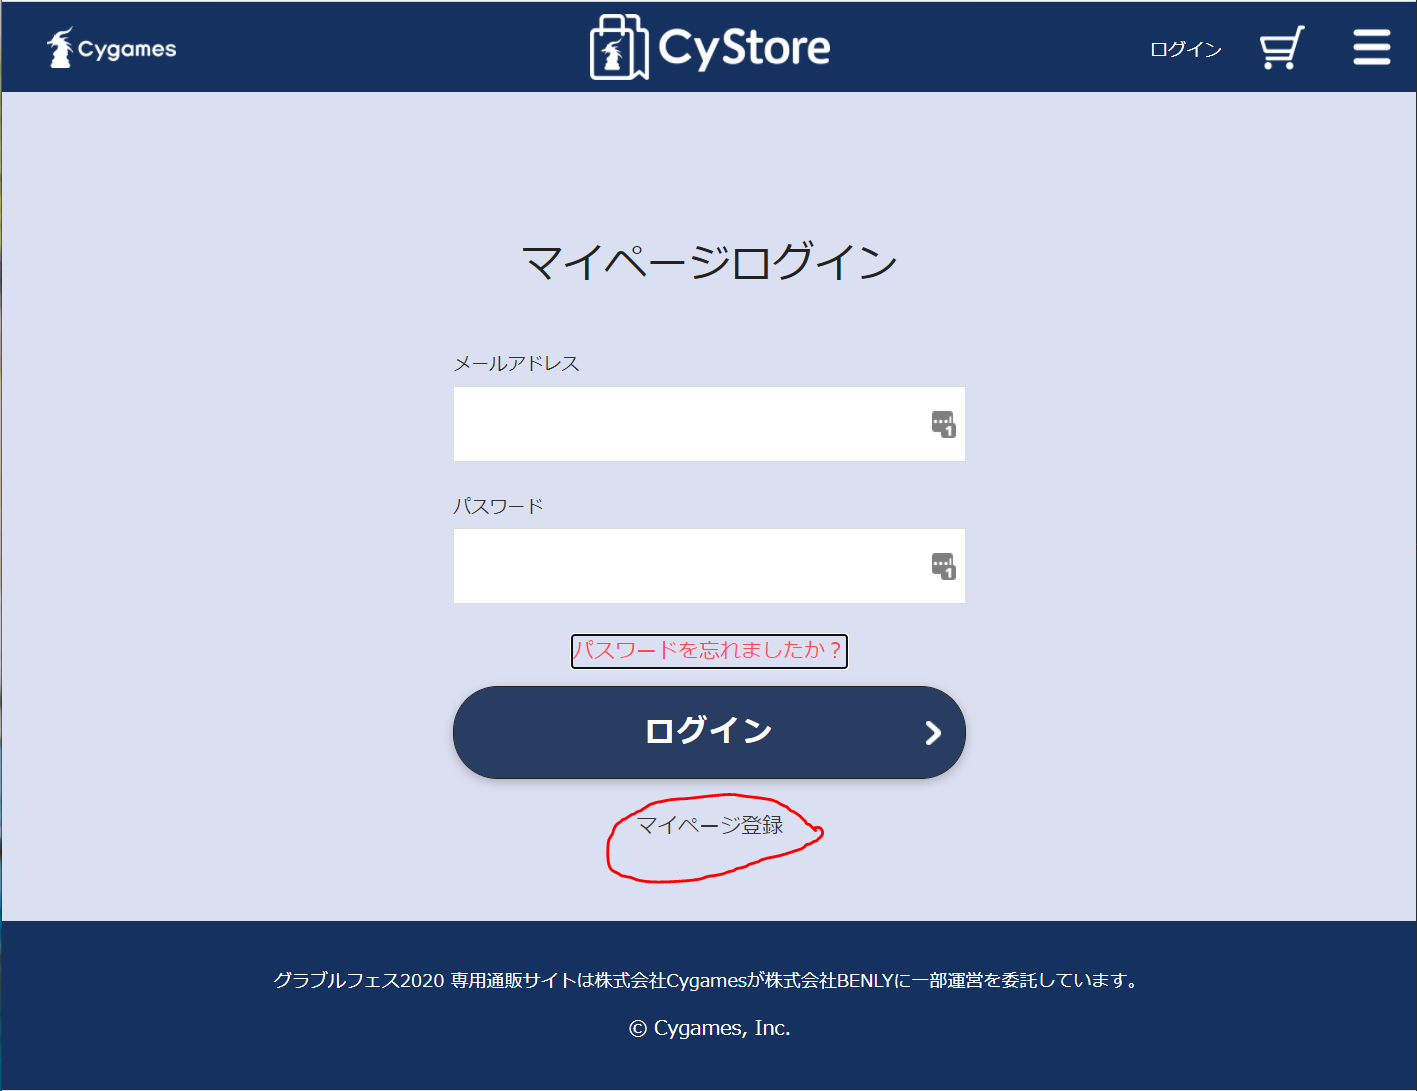
- Navigate to the Granblue Fes Store. You will need to register for a new account, even if you’ve previously created an account for Extra Fes or Valentines.
- Click on the link circled in red to create your account
- From top to bottom: Last Name, First Name, email address, and create password

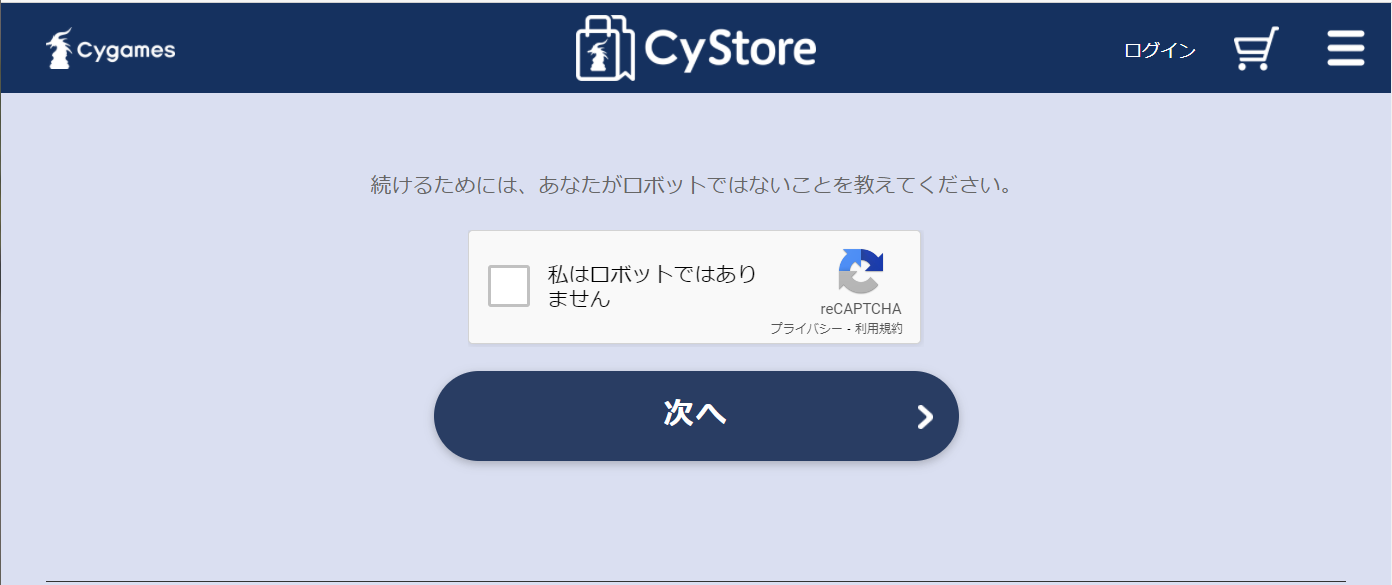
- Click on the captcha checkbox, then click on the blue button below it.
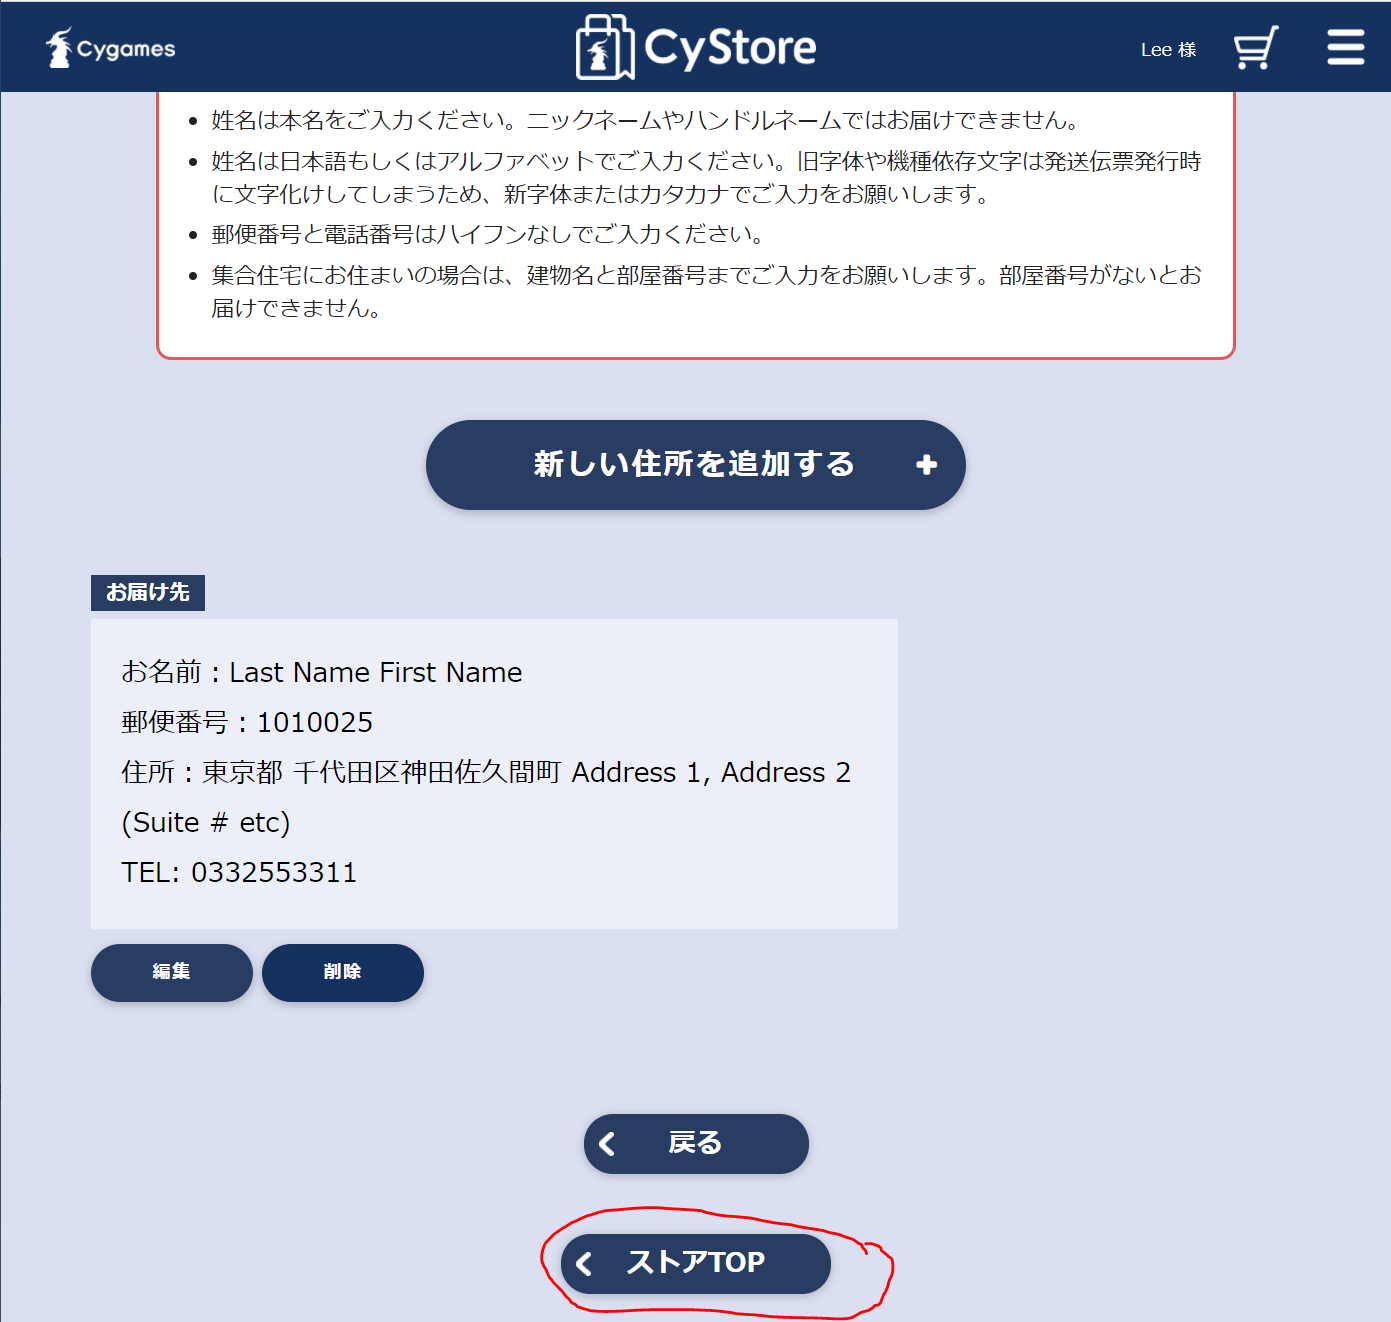
- The next page will ask you to create a shipping address. Dropdown is Municipality (Tokyo, Kyoto, etc), then going down the fields, City, Address, Address 2, Phone Number

- After you registered your address, click on the button circled below to go back to the main page.
Buying Something
Now navigate to what product you want to buy – for this example, we’re going to get a pamphlet. Go to the product page and click on the blue button with the shopping cart icon.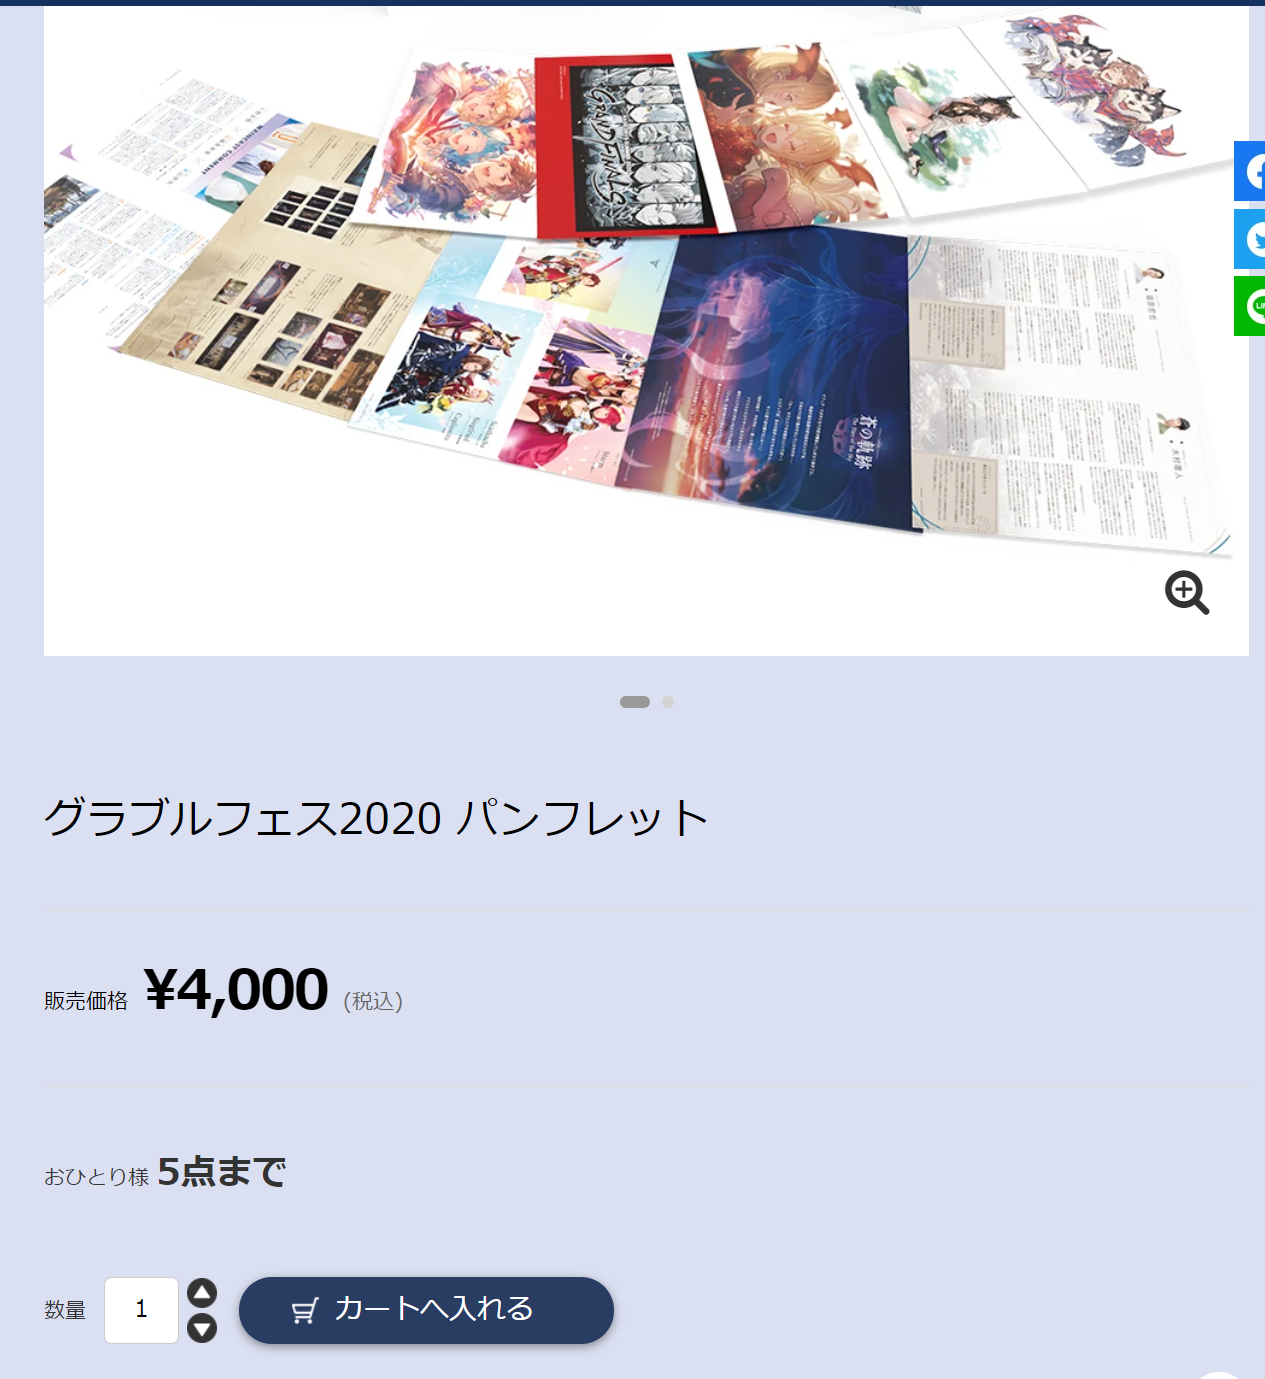
If this is the only thing you’re buying, click on the button that we’ve circled in red to check out. Otherwise, click on the link circled in blue to continue shopping.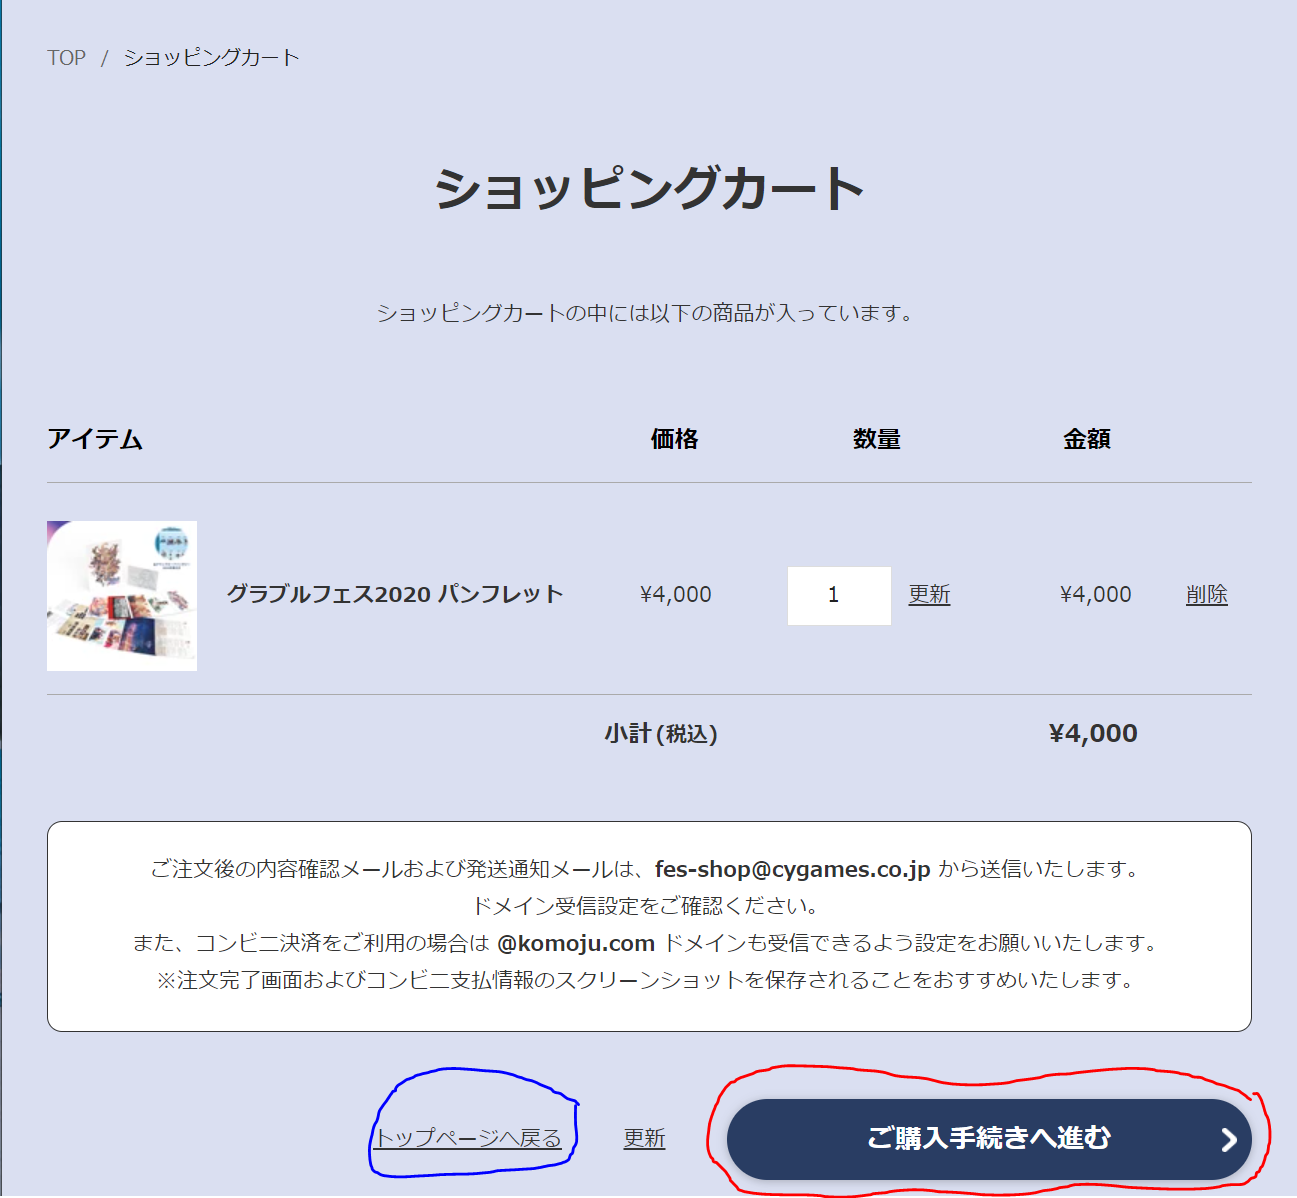
When you check out, the screen will first show the fields to enter your shipping address. Because you already registered an address when you created your account, it uses that to automatically fill in the fields. Click on the light blue button in the lower right corner to continue.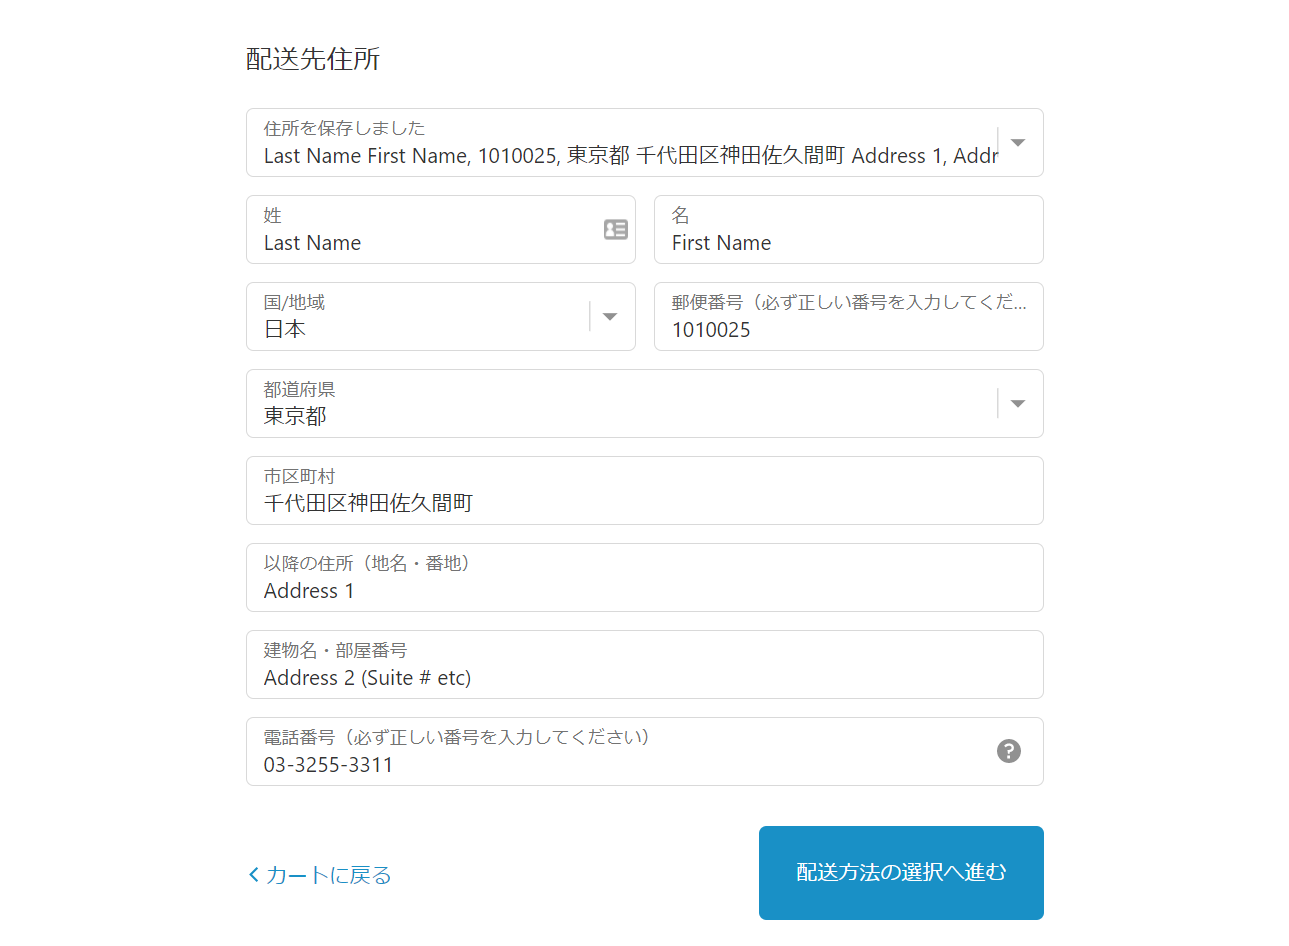
On the next screen, it will show you the total charges. Click on the light blue button in the lower right corner to enter payment information.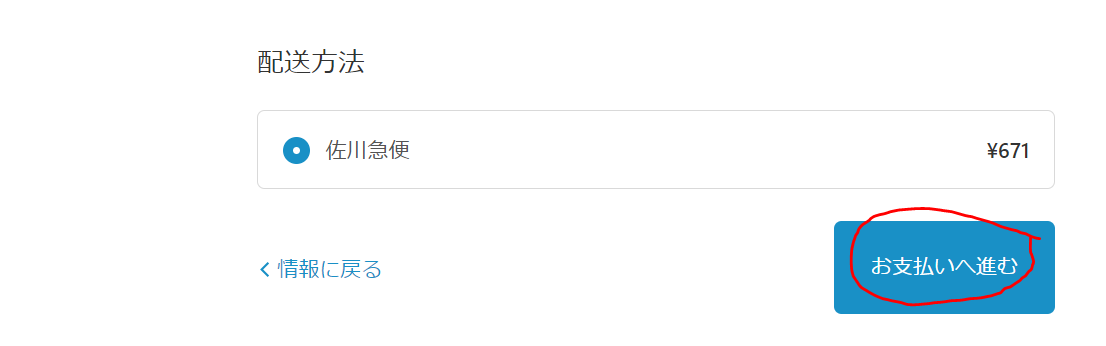
Payment Info – top part we’ve circled in red is credit card info. Credit card number, Name on Card, Expiration Date, and Security code. Paypal is also an option.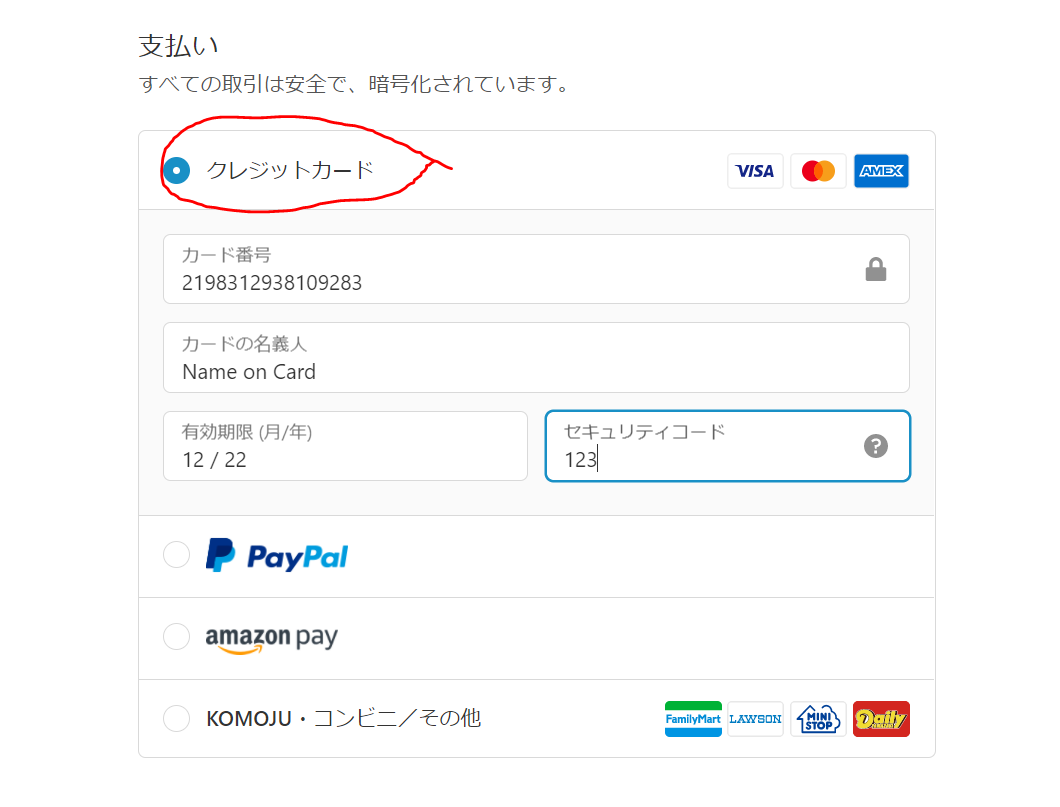
We can’t go further without actually buying something, but there should be one or two more screens asking for confirmation, and then you’ll have purchased your item(s).